Happy Monday Zensters and new readers, I hope you all had an enjoyable weekend. We’re going to start out the week with a Photography Tip that’s both challenging and fun. Today’s post takes us to the zoo.
The zoo not only gives us a wonderful opportunity to photograph wildlife, it’s also a great place to photograph people and their interactions with the animals. It provides a great place to not only practice your photography skills but it also will teach you to overcome some obstacles as well. Today I’ll share some tips to get the most out of your trip to the zoo.
Prepare for the trip
Your success is going to depend on how well you’ve prepared. You’ll be doing a lot of walking and standing on your feet so it’s probably a good idea to travel as light as possible and wear a comfortable pair of shoes. The best time to take photographs at the zoo is early in the day or late afternoon. This is when the animals are going to be most active giving you the best opportunity to get a great shot. Find out when feeding time is, that’s a great time to get good action shots. I would try to plan your trip during the week when the crowds will be far less than they are on the weekends. You can also try calling your local zoo, some allow photographers early access to the park for a fee, giving you the opportunity to shoot without interference.
Pack your camera, extra batteries and memory cards, you’ll be taking a lot of photos. Most of the photos you’ll shoot will probably require a telephoto lens with a focal length of 200-300mm. You’ll also have some opportunity to get closer shots of wildlife behind glass exhibits, or your zoo might even have a butterfly garden. In these cases, a lens in the 50-70mm range will come in handy. Hopefully you have a zoom such as a 70-300mm or 80-200mm in which case, one lens will be all you need to carry that day. Whatever lens or combination of lenses you decide to take, make sure you have a lens hood for them all. You’ll be shooting in all kinds of different light and dealing with the sun from all kinds of different angles. The hood will help eliminate lens flare you might encounter.
I am going to recommend leaving your tripod at home. It’s going to be cumbersome, especially if the park ends up being crowded that day. Not only will it take up a lot of room, you’ll have issues of people, especially kids, accidentally bumping into or kicking it as they attempt to get a closer view of the animals. If you absolutely feel the need to bring a tripod, take a monopod instead.
Arriving at the zoo
Hopefully the day you arrive is a beautiful sunny day, the park is not crowded and you’ve arrived early. If it’s overcast, don’t worry, you’ll still be able to get some great shots and not have to worry about harsh shadows or battle the sun in certain angles. I would just try to keep the dull sky out of the shot the best I could. If it’s raining, well, I don’t know about you but I’m going home and scheduling for another day.
So, you’ve decided that all conditions are perfect and you’re going to spend the day. The very first thing you should do is get a map of the zoo and plan your route. It’ll help you decide which exhibits you want to visit and the easiest routes between them. Sometimes the feeding times are listed on the map as well so you can plan accordingly. Of course, no trip to the zoo is complete without walking past the antelope exhibit and asking “What’s Gnu?”
Lights, Camera, Action
Here are some tips to help you make the most out of your day and capture the best images possible.
1- Be Patient. Rarely will you walk up to an animal exhibit and see them posing, ready for you to take the shot. Animals will seldom stay in one spot for very long. Spend some time around the exhibit, watch the animals as they interact and move around. You might just catch the perfect moment by being patient.
2- Eliminate fences and other distractions. You want to create the illusion that these were taken in their natural environment. Items such as fences, doors, ropes with tires, etc, will take away from the image. Try to find a vantage point that focuses on the animal and it’s habitat.
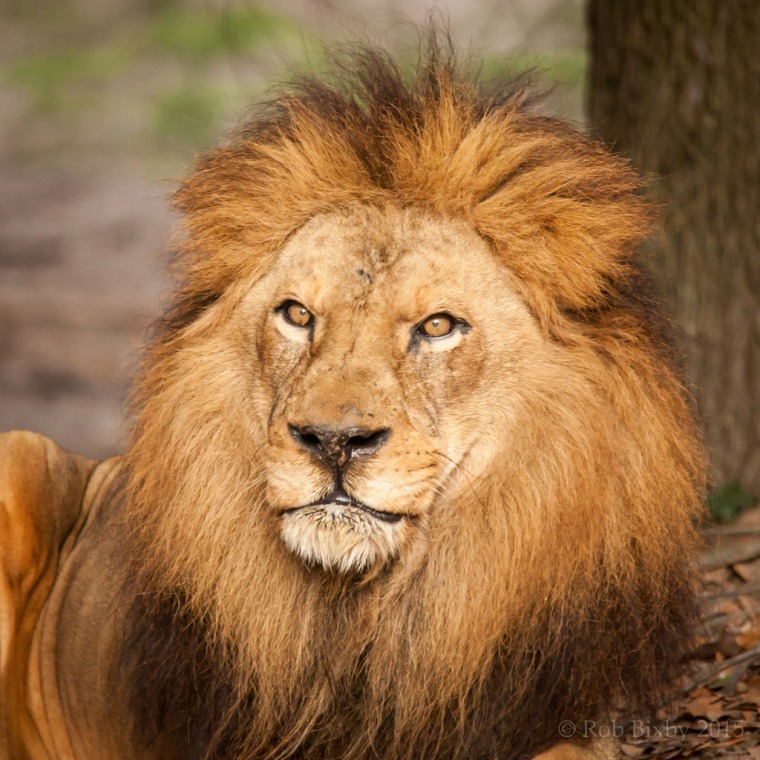
3- Fill the frame. As shown in the example below, try to use as much of the frame as possible for an interesting composition. You don’t need to see the whole picture to know it’s a lion, but it’s a great perspective of a lion up close. Elephants, zebras and giraffes are great subjects for up close, filled frame shots.

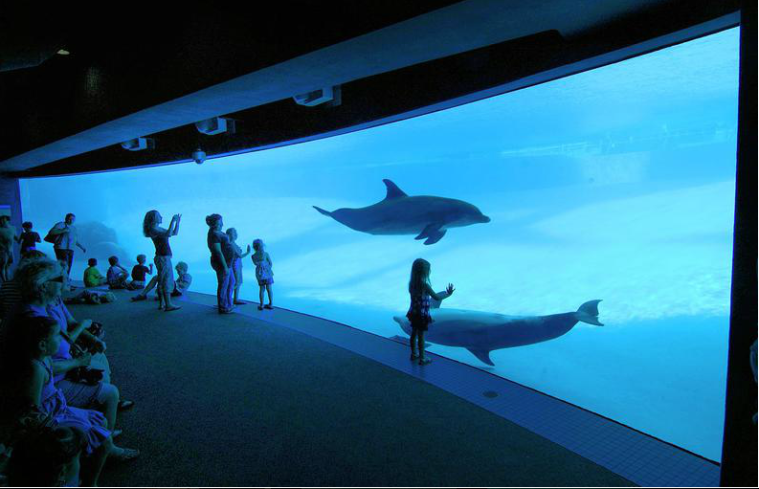
4-Include people in your shots. Don’t forget to look around and observe people as they interact with the animals. You can heart-warming images, as shown in the photo I took at the Aquarium in Corpus Christi (below) or humorous shots of people mimicking the animals they are observing. Be aware of what’s going on around you, you might be surprised at what you’ll catch!
5- Be courteous. Please keep in mind that the others in the park have as much right to the zoo as you do. The fact that you have a camera with a big lens on it does not give you preferential treatment. I’m only mentioning this because I have witnessed photographers being extremely rude which only gives the rest of us a bad name. I’ll refer back to tip #1- Be patient.
Hopefully your day at the zoo produced some excellent images. Maybe they were just “ok” and you’ll evaluate what you could have done better and return with a better game plan. Sometimes it just about being at the right place at the right time. Whatever your results, you spent the day outside, in a beautiful park with your camera. Now I ask you, what more could you ask for?
Thanks for reading.
